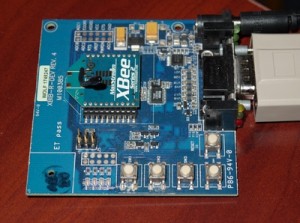
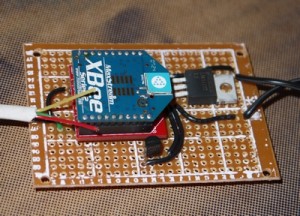
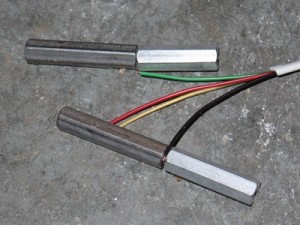
Start with the modules programmed, wired and plugged in as described in the last 2 posts. The modules should be communicating and sending the sensor samples. We now need to read the data from the serial port and write a tweet when the sensor indicates a low on DIO4. Before writing and running this code, you will need to have set up a Twitter account and set up an Application. Then follow this account from your main twitter account, enabling mobile messaging if you want to receive a text message when an event occurs.
This is developed on Ubuntu, but using the Perl scripting language that should be portable to other platforms. Use CPAN to install the dependent modules:
- Device::SerialPort for communications with the XBee
- Tie::CharArray for splitting a string into a character array
- Net::Twitter provides a class to interface with Twitter
Open and read data from the serial port. We convert the received binary string into a character array of the ordinal values for easier processing. Then copy characters read into a processing buffer so we can handle multiple reports coming in a single read or partial reads.
my $port=Device::SerialPort->new("/dev/ttyS0");</pre>
while ($timeout>0)
{
	my ($count,$saw)=$port->read(255); # will read _up to_ 255 chars
	tie my @chars, 'Tie::CharArray::Ord', $saw;
	for ($i = 0; $i < $count; $i++) {
		push(@buffer, @chars[$i]);
		printf("0x%02x ", @buffer[$i]);
	}
We then run a series of checks on the header information to verify the packet is received correctly. First check the header character for proper framing, or throw away characters until we find the next frame header.
	# check frame header
	if (@buffer[0] != 0x7e) {
		printf("Bad Frame\n");
		shift(@buffer);
		next;
	}
Then verify all the characters expected have been received by checking the packet size.
	# check all chars are now in buffer
	$size = @buffer[2] + @buffer[1] * 0x100;
	printf("Size:     %d\n", $size);
	if ($size > scalar(@buffer) - 4) { next; }
Then verify the contents of the package by running the checksum operation.
	# check checksum
	$sum = 0;
	for ($i = 0; $i < $size ; $i++) {
		$sum += @buffer[$i + 3];
	}
	$sum = 0xff - $sum % 0x100;
	if ($sum != @buffer[$size + 3]) {
		printf("Checksum: FAIL %02x != %02x\n", $sum, @buffer[$size + 3]);
		next;
	} else {
		printf("Checksum: PASS %02x\n", $sum);
	}
If contents are complete and intact, copy message to a packet buffer.
	my @packet;
	for ($i = 0; $i < $size + 4 ; $i++) {
		push(@packet, @buffer[$i]);
	}
If an packet received is an IO sample packet, process the IO message. Then remove this packet from the input buffer.
	if (@buffer[3] == 0x92) {
		ProcessIO(\@packet);
	}
	for ($i = 0; $i < $size + 4; $i++) {shift(@buffer);}
In the ProcessIO sub routine, extract the packet information. Fetch the device ID of the sending XBee, the 16 bit ID, packet type, and read digital IO 4.
sub ProcessIO {
	my @packet = @{(shift)};

	my $xbeeid = sprintf("%02x%02x%02x%02x%02x%02x%02x%02x", @packet[4], @packet[5], @packet[6],
		@packet[7], @packet[8], @packet[9], @packet[10], @packet[11]);
	printf("DeviceID: %s\n", $xbeeid);

	printf("Net MyID: %02x%02x\n", @packet[12], @packet[13]);

	printf("PackType: %02x\n", @packet[14]);

	my $dio4 = (@packet[20] & 0x10) != 0;
Once we have this information, we compare the device ID to verify it is the sensor device we are interested in. Then check if the DIO4 line has been brought low from previously being high since we only want to tweet the first time water is detected, not every second. This code is taken from the sample code in the Net::Twitter documentation. Net::Twitter->new creates and authenticates a connection with Twitter, then ->update posts a tweet. A time stamp is added to the message, otherwise it may be rejected as a duplicate tweet.
 	if ($xbeeid eq $xbee_basement) 	{ 		if (($dio4 == 0) && ($last_water == 1)) 		{ 			printf("DETECTED WATER!!\n"); 			my $nt = Net::Twitter->new(
				traits   => [qw/OAuth API::REST WrapError/],
				consumer_key        => $consumer_key,
				consumer_secret     => $consumer_secret,
				access_token        => $token,
				access_token_secret => $token_secret,
			);

			$now_string = strftime "%H:%M", localtime;
			$tweet = sprintf("At %s Basement sensor 4 detected water", $now_string);

			my $result = $nt->update($tweet);
			#print Dumper $result;
		}
		$last_water = $dio4;
Then just run the script from a terminal.
Perl xbee.pl
use Device::SerialPort;
use Tie::CharArray;
use Net::Twitter;
use Data::Dumper;
use POSIX qw(strftime);

 my $port=Device::SerialPort->new("/dev/ttyS0");

 my $STALL_DEFAULT=60; # how many seconds to wait for new input

 my $timeout=$STALL_DEFAULT;

my $consumer_key = "your consumer key";
my $consumer_secret = "your consumer secret";
my $token = "your token";
my $token_secret = "your token secret";
my $xbee_basement = "0013a200400a1896";

 $port->read_char_time(0);     # don't wait for each character
 $port->read_const_time(500); # 1 second per unfulfilled "read" call
 my $last_water = 1;

 sub ProcessIO {
	my @packet = @{(shift)};

	my $xbeeid = sprintf("%02x%02x%02x%02x%02x%02x%02x%02x", @packet[4], @packet[5], @packet[6],
		@packet[7], @packet[8], @packet[9], @packet[10], @packet[11]);
	printf("DeviceID: %s\n", $xbeeid);

	printf("Net MyID: %02x%02x\n", @packet[12], @packet[13]);

	printf("PackType: %02x\n", @packet[14]);

	my $dio4 = (@packet[20] & 0x10) != 0;

	if ((@packet[16] & 0x04) != 0) { printf("DIO10:   %d\n", (@packet[19] & 0x04) != 0); }
	if ((@packet[16] & 0x08) != 0) { printf("DIO11:   %d\n", (@packet[19] & 0x08) != 0); }
	if ((@packet[16] & 0x10) != 0) { printf("DIO12:   %d\n", (@packet[19] & 0x10) != 0); }
	if ((@packet[17] & 0x01) != 0) { printf("DIO0:    %d\n", (@packet[20] & 0x01) != 0); }
	if ((@packet[17] & 0x02) != 0) { printf("DIO1:    %d\n", (@packet[20] & 0x02) != 0); }
	if ((@packet[17] & 0x04) != 0) { printf("DIO2:    %d\n", (@packet[20] & 0x04) != 0); }
	if ((@packet[17] & 0x08) != 0) { printf("DIO3:    %d\n", (@packet[20] & 0x08) != 0); }
	if ((@packet[17] & 0x10) != 0) { printf("DIO4:    %d\n", $dio4); }
	if ((@packet[17] & 0x20) != 0) { printf("DIO5:    %d\n", (@packet[20] & 0x20) != 0); }
	if ((@packet[17] & 0x40) != 0) { printf("DIO6:    %d\n", (@packet[20] & 0x40) != 0); }
	if ((@packet[17] & 0x80) != 0) { printf("DIO7:    %d\n", (@packet[20] & 0x80) != 0); }
	$as = 21;
	if ((@packet[18] & 0x01) != 0) { my $val = @packet[$as++] * 0x100 + @packet[$as++]; printf("AD0:    %4x\n", $val); }
	if ((@packet[18] & 0x02) != 0) { my $val = @packet[$as++] * 0x100 + @packet[$as++]; my $cval = $val * 100.0 / 0x3ff; printf("AD1:    %4x %4.1fC %4.1fF\n", $val, $cval, $cval * 9 / 5 + 32); }
	if ((@packet[18] & 0x04) != 0) { my $val = @packet[$as++] * 0x100 + @packet[$as++]; printf("AD2:    %4x\n", $val); }
	if ((@packet[18] & 0x08) != 0) { my $val = @packet[$as++] * 0x100 + @packet[$as++]; printf("AD3:    %4x\n", $val); }
	if ((@packet[18] & 0x80) != 0) { my $val = @packet[$as++] * 0x100 + @packet[$as++]; printf("VSS:    %4x\n", $val); }

	if ($xbeeid eq $xbee_basement)
	{
		if (($dio4 == 0) && ($last_water == 1))
		{
			printf("DETECTED WATER!!\n");
			my $nt = Net::Twitter->new(
				traits   => [qw/OAuth API::REST WrapError/],
				consumer_key        => $consumer_key,
				consumer_secret     => $consumer_secret,
				access_token        => $token,
				access_token_secret => $token_secret,
			);

			$now_string = strftime "%H:%M", localtime;
			$tweet = sprintf("At %s Basement sensor 4 detected water", $now_string);

			my $result = $nt->update($tweet);
			#print Dumper $result;
		}
		$last_water = $dio4;
	}
 }

 my @buffer;
 while ($timeout>0)
 {
	my ($count,$saw)=$port->read(255); # will read _up to_ 255 chars
	tie my @chars, 'Tie::CharArray::Ord', $saw;
	for ($i = 0; $i < $count; $i++) { 		push(@buffer, @chars[$i]); 		printf("0x%02x ", @buffer[$i]); 	} 	if ($count > 0) { printf("\n"); }

	if (scalar(@buffer) == 0) { next; }

	# check frame header
	if (@buffer[0] != 0x7e) {
		printf("Bad Frame\n");
		shift(@buffer);
		next;
	}

	# check all chars are now in buffer
	$size = @buffer[2] + @buffer[1] * 0x100;
	printf("Size:     %d\n", $size);
	if ($size > scalar(@buffer) - 4) { next; }

	# check checksum
	$sum = 0;
	for ($i = 0; $i < $size ; $i++) {
		$sum += @buffer[$i + 3];
	}
	$sum = 0xff - $sum % 0x100;
	if ($sum != @buffer[$size + 3]) {
		printf("Checksum: FAIL %02x != %02x\n", $sum, @buffer[$size + 3]);
		next;
	} else {
		printf("Checksum: PASS %02x\n", $sum);
	}

	my @packet;
	for ($i = 0; $i < $size + 4 ; $i++) {
		push(@packet, @buffer[$i]);
	}

	printf("Command:  %02x\n", @buffer[3]);
	if (@buffer[3] == 0x92) {
		ProcessIO(\@packet);
	}

	# Check here to see if what we want is in the $buffer
	# say "last" if we find it
	for ($i = 0; $i < $size + 4; $i++) {shift(@buffer);}
	$timeout = $STALL_DEFAULT;
}

 if ($timeout==0) {
        die "Waited $STALL_DEFAULT seconds and never saw what I wanted\n";
 }
